Configuring single sign-on with OpenID Connect
SoftExpert Suite supports single sign-on via OpenID Connect, enabling the system administrator to set configurations with multiple identity provision platforms. Next, we will show how to configure authentication via OpenID Connect on the Google platform:
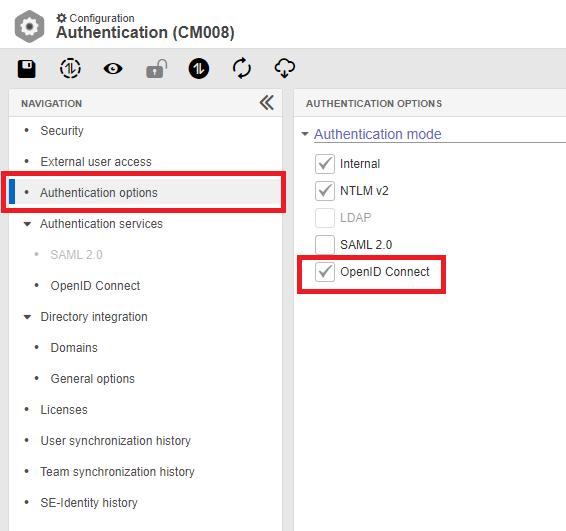
- Access the "Configuration component > Configuration > Authentication (CM008)", select "Authentication options", and check the "OpenID Connect" option to enable user authentication via OpenID Connect.

- From the side menu, in "Authentication services > OpenID Connect", add a new configuration. On the screen that will open, provide an ID # for this configuration and use the field corresponding to the login, which will be compared to the SoftExpert Suite login field (commonly, the default e-mail is used).
- Fill in the configuration fields in accordance with the identity provider being used. Below, we provide configuration examples using the Google service:
- Authorization Endpoint URL: Identity provider authorization URL (https://accounts.google.com/o/oauth2/v2/auth)
- Endpoint URL Token: URL for getting the identity provider access token (https://oauth2.googleapis.com/token)
- Client ID: Application ID provided by the identity provider
- Client Secret: Application secret key provided by the identity provider
- User Info URL: URL for getting additional user information from the identity provider (https://openidconnect.googleapis.com/v1/userinfo)
- Scopes: Scopes that define the authentication request and what sets of information we want to receive (e.g. "e-mail")
For detailed instructions on how to manage and register your application with Google, see the documentation made available by the provider.