Creating a dataset
Prerequisites:
Access to the Form > File >** Dataset (FO009)** menu.
To create or edit a dataset, first access the File -> Dataset menu. Then,
click on the ![]() button to create a dataset, or click on
the
button to create a dataset, or click on
the ![]() button to edit the dataset selected on the main
screen.
button to edit the dataset selected on the main
screen.
The dataset screen is a wizard that divides the creation or editing operation into four steps. If the dataset is being edited, click on the
Next button until you reach the step that contains the information that will be changed.
Step 1: General data
In this step, fill in the following fields:
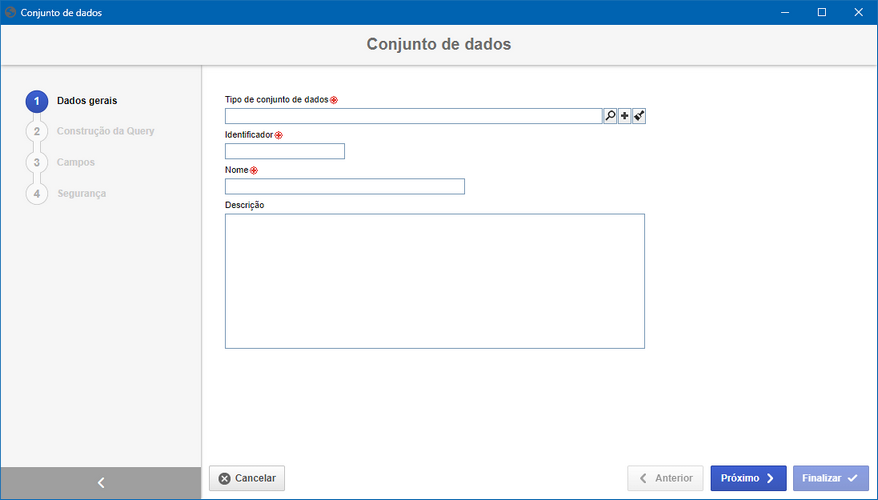
- Dataset type: Select the type that classifies the dataset being created.
- ID #: Enter a number or code for the ID # of the dataset.
- Name: Enter a name for the dataset.
- Description: In this field, provide descriptions regarding the dataset.
After completing the fields, click on the Next button.
Step 2: Building the query
In this step, enter the SQL command that will define the search criteria and the data that will be used in the dataset being configured. To do this, fill in the following fields:
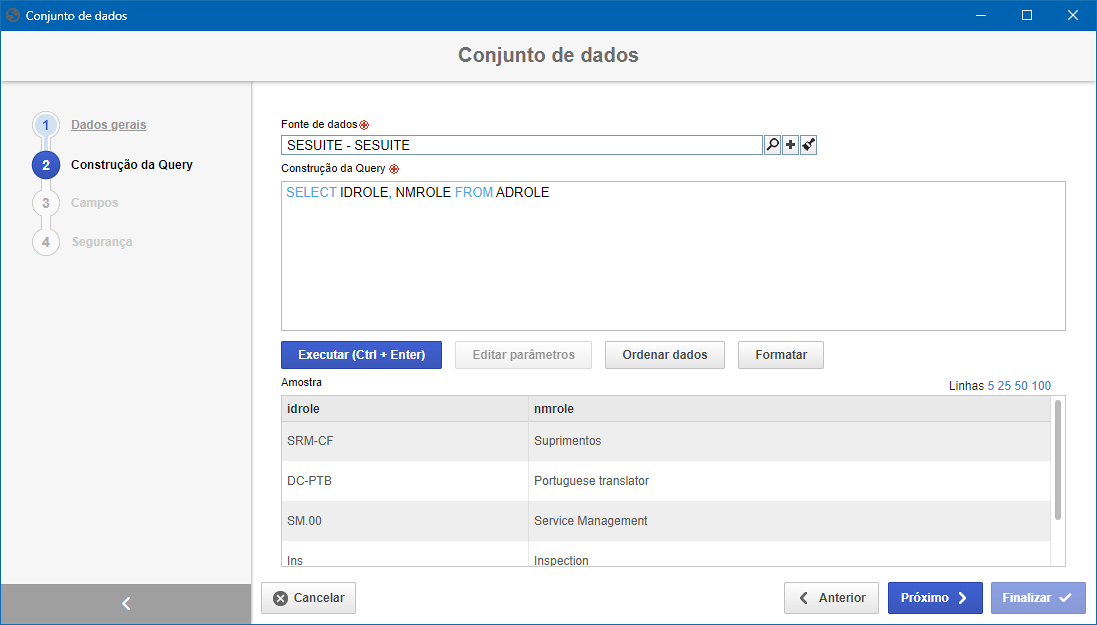
- Data source: Select the data source for the dataset. The data source
establishes the connection to the database and must be previously configured
in Data source.
However, if the logged-in user has permission, the
 button will be displayed next to this field, enabling the insertion of a new
data source. Details on how to add a new data source can be found in the
documentation on how to create a new
data source.
button will be displayed next to this field, enabling the insertion of a new
data source. Details on how to add a new data source can be found in the
documentation on how to create a new
data source. - Construct query: Enter in this field the SQL command that will be used in the analysis.
| Button | Description |
|---|---|
Run (Ctrl + Enter) | Click on this button to test the query entered in the "Construct query" field. If a command error occurs, it will be displayed on the screen. |
| Edit parameters | This button will only be enabled when there is a condition in the query whose value is variable. In that is the case, you need to use ":" after the assignment to identify that the value must be a parameter.For example: SELECT IDLOGIN, NMUSER FROM ADALLUSERSWHERE IDLOGIN =:ParamLoginWhere 'ParamLogin' is a form parameter. If there are parameters in the query, when you click on the Run button , the system will automatically display the parameters screen, where the values for simulating the execution of the query must be entered. |
| Sort data | When this button is clicked, the screen for defining the sorting parameters will be displayed. In the "Field" field, select the column (of the query) by which the data will be sorted, and in the **"Orientation"**field, define whether the order will be ascending or descending. If you need to sort the data using a second column, click on "Add new", insert the column, and set the sorting orientation. Then, click on "Apply" so that the sorting is applied to the query result. Note: The data can only be sorted through the columns returned in the query (defined in SELECT). If the SQL command is showing all columns (SELECT * FROM TABLE), all columns will be displayed in the "Field" field. |
| Format | Click on this button for the system to apply formatting (indentation) to the SQL command, making it more readable for future changes. |
After configuring the query, click on the Next button.
Step 3: Fields
In this step, all fields from the query run in the previous step will be presented so that their labels can be edited. To do this, in the Label for user column, change the name that will be displayed for each label, which, by default, will come with the same name shown in the query.
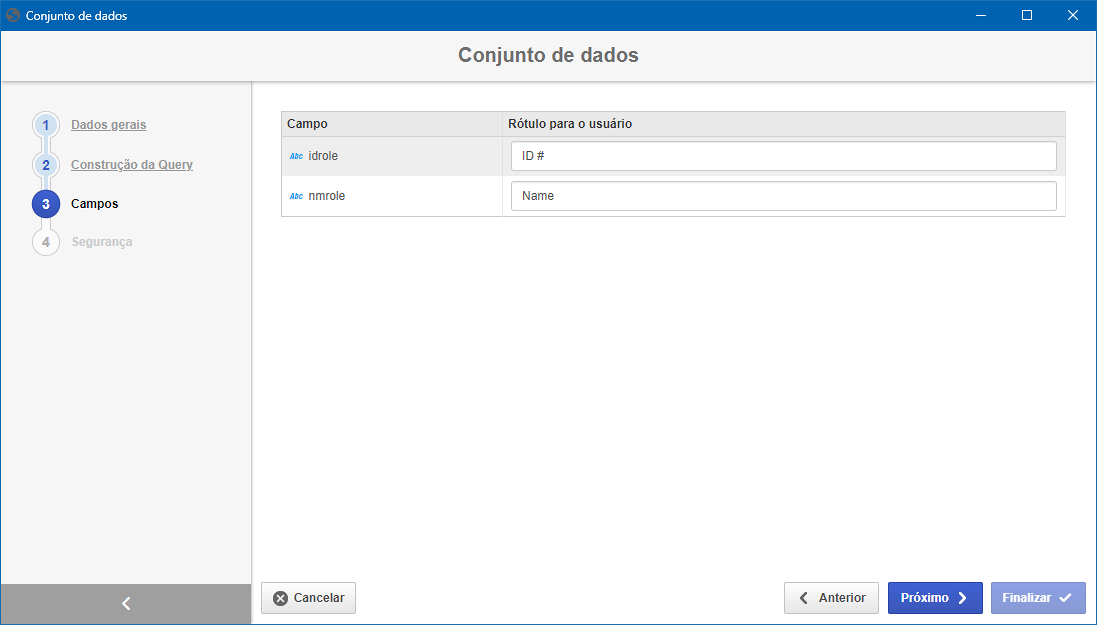
After configuring the labels of the fields, click on the Next button .
Step 4: Security
In this step, select who will have access to the dataset. Enable the desired option:
1. Private
If this option is enabled, only the users specified in this tab will be able to edit or view the dataset. To do this, use the following columns:
- Edit: Define the users, teams, departments and/or positions that will have permission to edit the dataset.
- View: Define the users, teams, departments and/or positions that will have permission to view the dataset.
2. Public
If this option is enabled, then all system users will be able to view the dataset; however, only those specified in the respective column will be able to edit it. Therefore, the View column will be disabled (since the dataset can be viewed by any user). In the Edit column, define the users, teams, departments and/or positions that will have permission to change the data in the dataset.
To add a user/team/department/position to the security list, simply type the
desired name in the available field and select the corresponding option from the
list that will be presented, or press the "Enter" key. To delete a
user/team/department/position from the security list, click on the
![]() button located next to the desired
record.
button located next to the desired
record.
Use the Finish button, located at the bottom of the wizard, to finish and save the dataset configuration.
- Use the Previous button , located at the bottom of the screen, to return to a previous step in the dataset configuration and make any necessary changes.
- Use the Cancel button , located at the bottom of the screen, to exit the dataset configuration wizard. Note that all data entered up to this point will be lost.