XLS or XLSX file structure definition
The DIINTERFACE table can be populated from an XLS or XLSX file. To use this resource, you must have a file with XLS or XLSX extension and whose header contains all the fields found in the DIINTERFACE table, on the first row.
The image below shows an example of a file with the required format:

To use an XLS or XLSX file to populate the DIINTERFACE table, it is imperative that its header contain all the fields of the table, regardless of whether they are used or not. In other words, all existing fields must be present in the file header.
This way, it is guaranteed that the data import will be carried out correctly and without errors.
Import and export features
See below the possible resources to be selected within the import function:
| Import data (Import spreadsheet) | Button used to import the spreadsheet into the system. | |
| Import template (Expose import template spreadsheet). | Button used to download the import template. | |
| Export data (Export spreadsheet) | Button used to export the spreadsheet to the computer. |
Download spreadsheet template
Instead of filling out all the columns in the DIINTERFACE table manually, the system allows you to download a ready-made template with these columns already populated, and you will just need to add the necessary information in the body of each column used. To download the spreadsheet template, go to the tracking screen, in Configuration -> Tool -> Import -> Tracking (CM015).
Within this screen, you can use the ![]() (Import template) button to download the template.
(Import template) button to download the template.
Importing files into the system
There are three different ways to import data into the system through the previously described spreadsheet template.
These three approaches are described below:
1. Upload via SoftExpert Suite
To upload a file, navigate to the tracking screen (Configuration -> Tool ->
Import -> Tracking (CM015)). Within this screen, use the
![]() Import spreadsheet button to upload the
file into the system. Then, a screen will open for the data import process to be
carried out. Drag the spreadsheet file onto the displayed screen, or select it
using the Select button. If the file to be imported is correct, the
following message will be displayed: "Excel file validated successfully".
After adding the file to the screen, use the Import button to complete the data
import.
Import spreadsheet button to upload the
file into the system. Then, a screen will open for the data import process to be
carried out. Drag the spreadsheet file onto the displayed screen, or select it
using the Select button. If the file to be imported is correct, the
following message will be displayed: "Excel file validated successfully".
After adding the file to the screen, use the Import button to complete the data
import.
2. Insertion via directory (for on-premise customers)
In order to be added via directory insertion, spreadsheet files must necessarily contain the word seimport in their names.
| Structure | Example |
|---|---|
<seimport> | seimport.xlsx |
<name> + <seimport> | example.seimport.xlsx |
<seimport> + <name> | seimport.example.xlsx |
<name> + <seimport> + <name> | example.seimport.example.xlsx |
Additionally, the file must be placed in the import directory:
/web/wwwroot/temp/.data_integration/import.
If the import directory does not exist yet, it must be created within
.data_integration in order for this resource to be used correctly.
The term se_suite_home refers to the directory where SoftExpert Suite is
installed.
If you are using the multidatabase feature, the file name must contain the domain present in the database_config file, followed by the _seimport suffix. In the table below, there are examples for setting names using the “www.softexpert.com” domain as an example.
| Structure | Example |
|---|---|
<domain> + <seimport> | www.softexpert.com_seimport.xlsx |
<domain> + <seimport> + <name> | www.softexpert.com_seimport.example.xlsx |
<name> + <domain> + <seimport> | example.www.softexpert.com_seimport.xlsx |
<name> + <domain> + <seimport> + <name> | example.www.softexpert_seimport.example.xlsx |
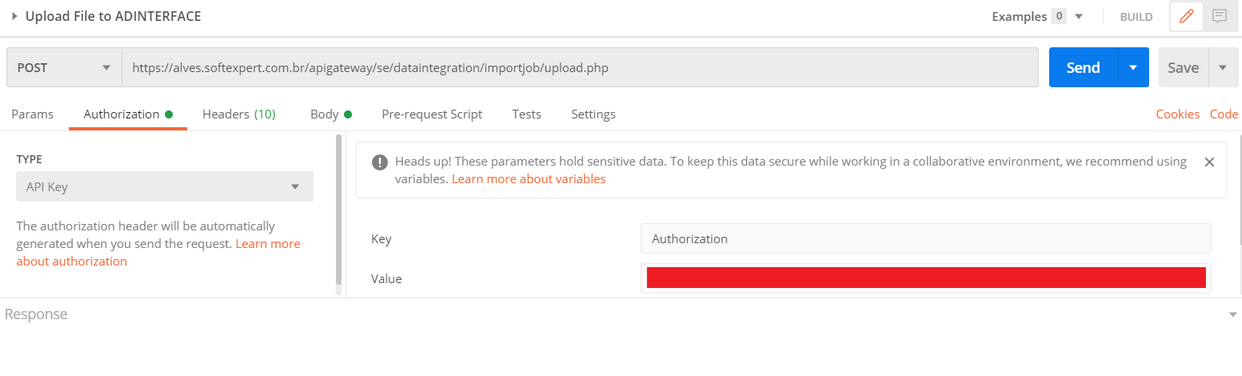
3. XLS or XLSX file upload via REST API
To use this API to upload data into the DIINTERFACE table, you must send a
POST-type HTTP request to the
https://my-domain/apigateway/se/dataintegration/importjob/upload.php endpoint,
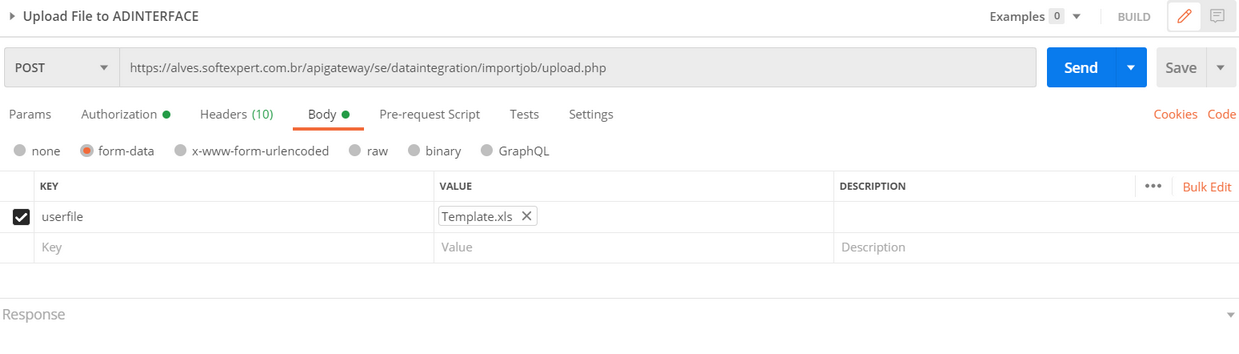
including the spreadsheet (in the format described in the previous topics) as a
parameter of the form-data-type form. The name of the parameter that must be
used to send the file is "userfile".
It is important to highlight that the endpoint in question follows the SoftExpert Suite API gateway security rules, which are described in the Integration via SOAP web services - Technical Overview section. Thus, the authentication layer of this endpoint will comply with these rules, ensuring that only authorized users can perform this operation.
To illustrate how to send a request using the Postman application, the images below provide a practical example. It is worth remembering that other HTTP client tools can also be used to perform this operation.