Using internal registry
This section contains the steps for installing, updating, and configuring an internal registry for consuming SoftExpert Suite images.
Prerequisite
In order for SoftExpert Suite to work properly, the following images must be available in your internal registry:
| Images | Service |
|---|---|
| enginewindows | SoftExpert Suite |
| secaptureservice | SoftExpert Capture |
ATTENTION
- Changing the values of the tags related to the versions of the images provided by SoftExpert is not allowed.
- Check the versions of the images available in the registry, as these versions will need to be used during configuration.
- Make sure you are logged into the registry before starting the procedure.
- If you are using the SoftExpert Capture service, make sure that the corresponding image is present in your registry.
Internal registry configuration
Installation
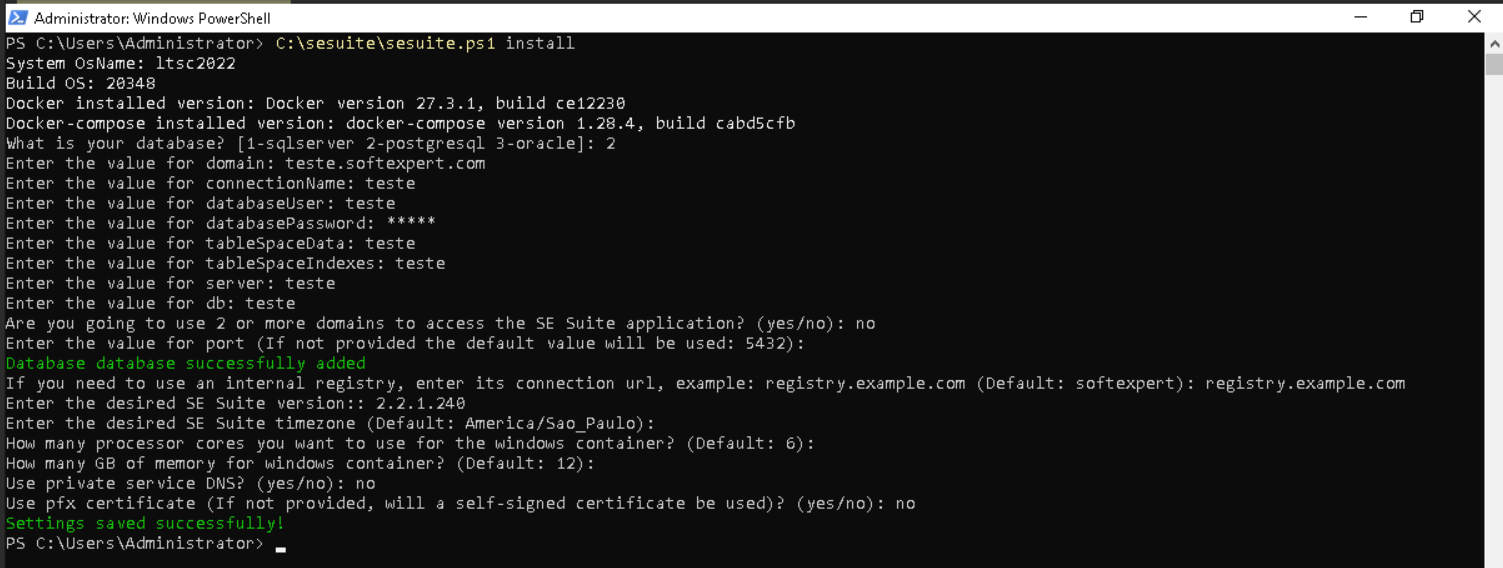
To perform a new installation of SoftExpert Suite using an internal registry, run the following command in PowerShell:
C:\sesuite\sesuite.ps1 install
When the command is run, the script will request the following SoftExpert Suite configuration information, as shown in the image below:
- Database connection details;
- Identification of the desired registry;
- Information about the version stored in the internal registry;
- Server configurations.

After providing all the information, return to the Installation guide to continue the process.
Update
To perform a 3rd- or 4th-digit update of SoftExpert Suite using an internal registry, you must configure the internal registry in advance, through the following procedure:
Internal registry configuration
Run the following command:
C:\sesuite\sesuite.ps1 settings
Select option 7, corresponding to 7 - Edit Registry, and enter the desired
registry, as shown in the evidence below:

ATTENTION
The default registry used by SoftExpert is softexpert.