Configuration for synchronization without direct access to the directory service - SoftExpert Identity
SoftExpert Identity is an application provided by SoftExpert that plays the role of an intermediary in synchronizing users between SoftExpert Suite and the directory service. It is designed to be used when the SoftExpert Suite server does not have direct access to the directory service through the LDAP protocol. When SoftExpert Identity is used, all domain connection configuration is set exclusively within the application, and it is not possible to have domains registered simultaneously in SoftExpert Suite and SoftExpert Identity.
The SoftExpert Identity application needs access to both the directory service and SoftExpert Suite, and can be installed on any computer that meets these requirements.
The synchronization process without SoftExpert Identity is carried out as follows:
- SoftExpert Suite connects to the directory service.
- It gets user data from the directory service.
- The data is processed, and the system user database is synchronized.
The synchronization process with SoftExpert Identity is carried out as follows:
- SoftExpert Suite connects to the directory service.
- It gets user data from the directory service.
- SoftExpert Identity then connects to SoftExpert Suite.
- It sends the data to SoftExpert Suite and triggers the synchronization mechanism.
- SoftExpert Suite processes the data received from the directory and synchronizes the system user database.
SoftExpert Identity application security
See below some considerations on the application regarding security:
- The application uses the LDAP (Lightweight Directory Access Protocol) to communicate with the directory service, with support for LDAPS (LDAP over SSL) for more secure connections.
- Communication with the SoftExpert Suite server to send user registration data obtained from the directory service is established using the HTTPS (Hyper Text Transfer Protocol Secure) protocol, ensuring security when sending information.
- The application does not make changes to the directory service; it simply performs readings restricted to the specified filters, directories, and attributes.
- The password of users registered in the directory service is not obtained or transferred at any time.
- Only the following registration data are read: Name, e-mail, ID, login, department, position, leader, ID # of the groups of which the user is a member.
- All application configuration is saved with the executable, in XML (Extensible Markup Language) format, and the passwords of the users used for communication with the directory service and SoftExpert Suite are encrypted in the file.
Configuring and executing indirect synchronization with SoftExpert Identity
To synchronize users through indirect communication mode via SoftExpert Identity, follow the steps below:
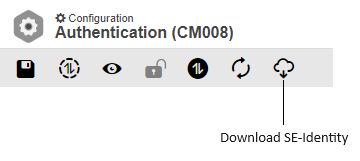
- Access the Configuration component > Authentication (CM008) in SoftExpert Suite and click on the button for downloading the SoftExpert Identity file (se-identity.zip).
- Before starting the SoftExpert Identity application, check that the Java platform is installed, version 1.8.x or later. If you need to download Java, go to its official website: https://www.java.com/download. After installing Java, you can run SoftExpert Identity by double-clicking on the se-identity.jar file or using the command line. If you want to check the installed Java version, use the "java -version" command. The following image illustrates the application being run via the command line, including the Java version check:
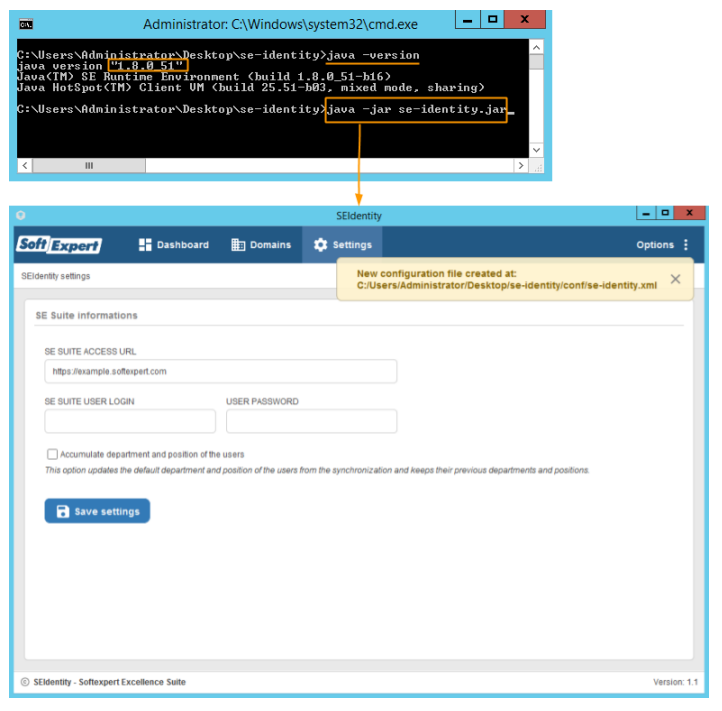
All configurations of the application are saved with the executable in XML (Extensible Markup Language) format [installation directory]/conf/se-identity.xml. Additionally, user passwords used for communication with the directory service and SoftExpert Suite are encrypted in the file.
With SoftExpert Identity configured and running, you will be ready to synchronize users indirectly, ensuring data integrity and information security.
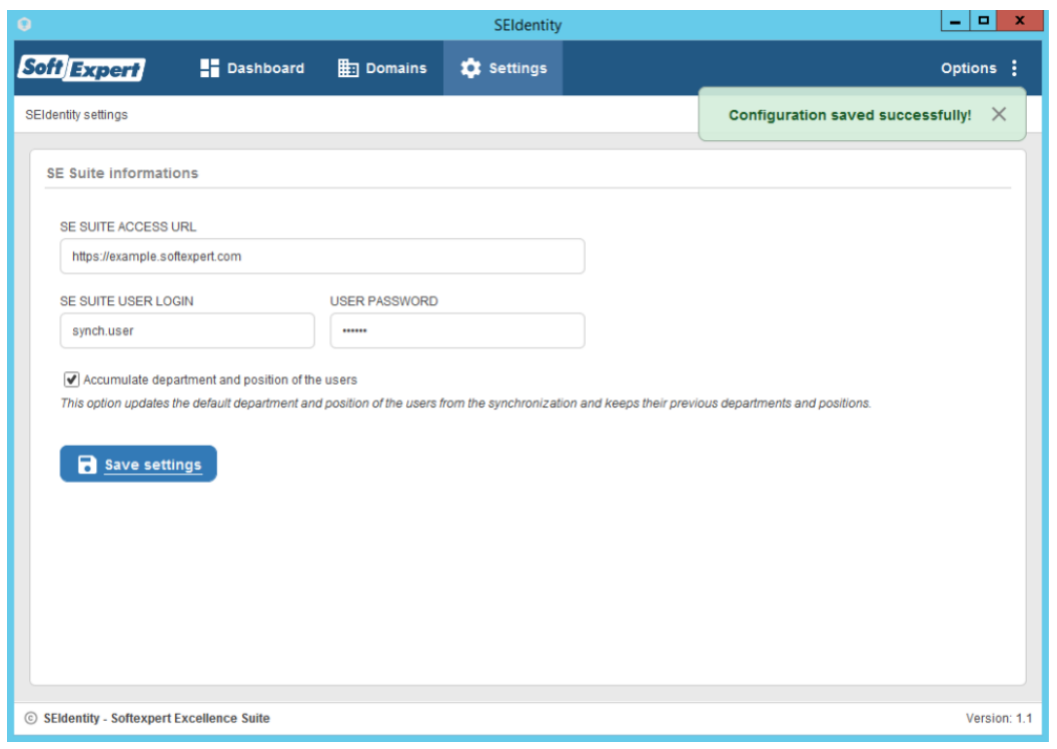
- The first step is to configure the connection to SoftExpert Suite. To do this, access the configurations and enter the SoftExpert Suite access URL, as well as the SoftExpert Suite user login:
- The system access URL must be entered before the suffix "/se" or "/softexpert". For example: https://example.softexpert.com.
- We recommend creating an exclusive user for the synchronization process, with permission to access the SoftExpert Suite Administration and Configuration components.
-
In this step, an example of domain configuration will be presented, followed by the execution of the simulation and user synchronization processes. In the example, SoftExpert Identity will connect to a Microsoft Active Directory service running on Windows Server 2012 R2.
- Domain configuration in SoftExpert Identity is performed in the Domains section and follows the same configuration logic explained in the Configuration for direct directory service access section of this document.
-
Go to the Dashboard section to simulate user synchronization:
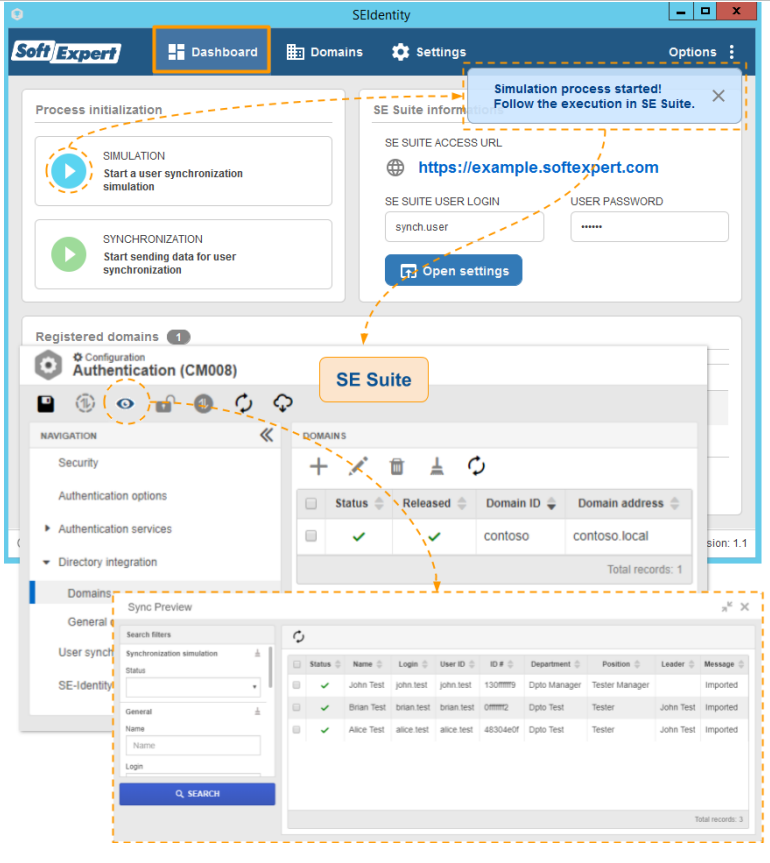
⚠️ Attention:
- After running the simulation process successfully, if the simulation display option remains disabled, there may be no data to be synchronized.
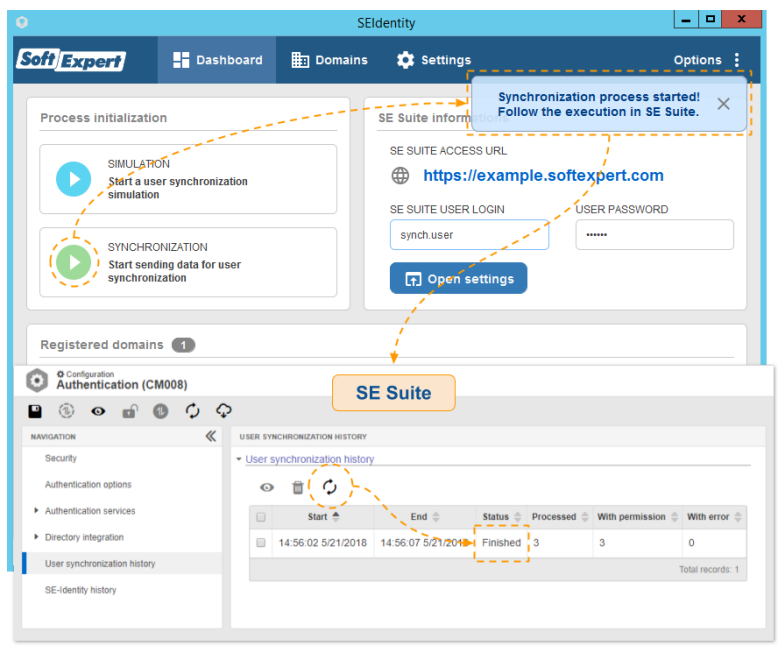
- After completing these steps, you can proceed with the user synchronization.
-
SoftExpert Identity keeps a history of simulation and synchronization processes in SoftExpert Suite, allowing future searches (except for records prior to the retention period defined in the audit configurations). In the history, you will be able to identify the application installation location, the network address of the computer on which it was run, the application version, and other relevant pieces of information about the process carried out. If an error preventing synchronization/simulation from starting occurs, the record status will be shown asError, and you can see the details by selecting the record and clicking on the View button.
-
It is possible to schedule the application to run on the operating system. This feature allows synchronization to be carried out automatically with previously defined settings. To do this, you need to run the application launch command with the "run" parameter:
$ javaw -jar se-identity.jar run
On Windows, you can create a scheduled task by accessing the Task Scheduler tool in the Control Panel Administrative Tools. Below is an example for creating a basic task that will be executed daily:
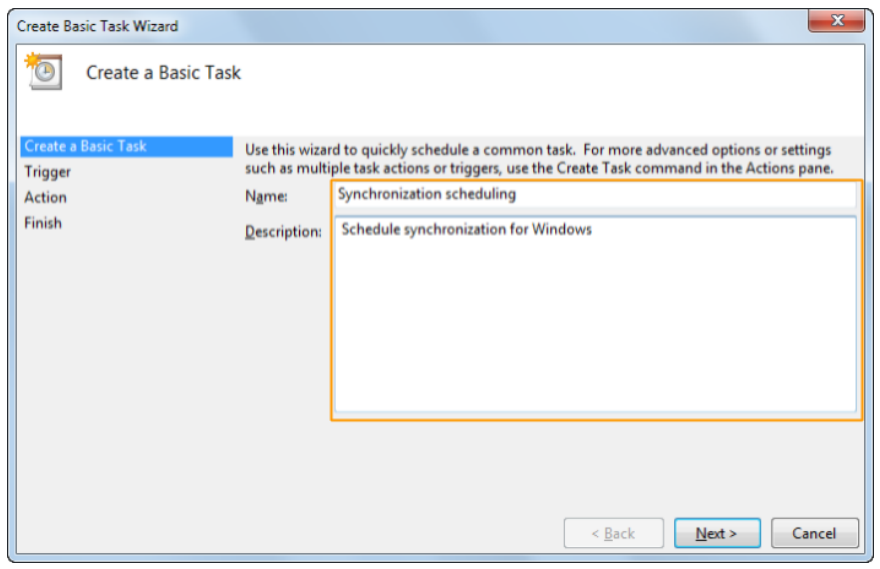
i. In the actions pane, located on the right side of the Task Scheduler screen, click the Create basic task option.
ii. On the next screen, provide a name and description for the task. Then, click on the Next button:
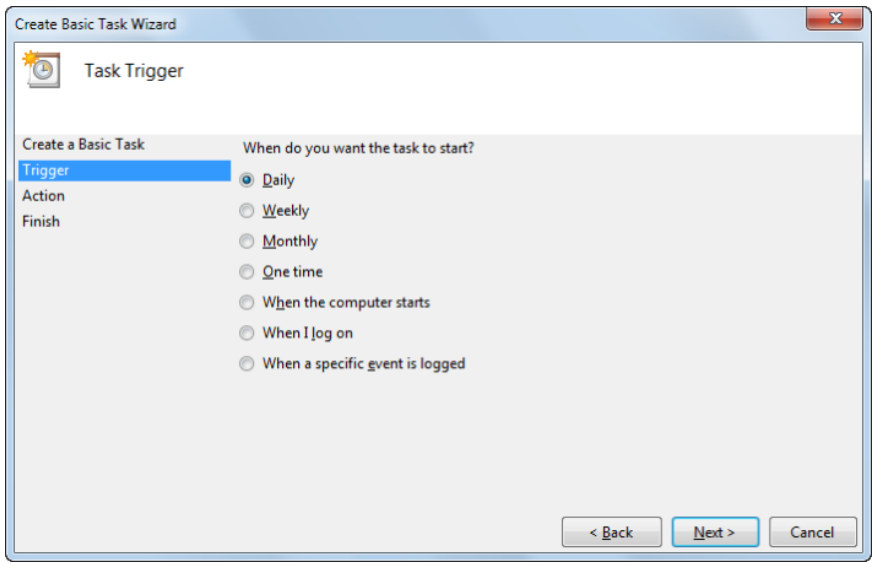
iii. In the "Trigger" step, define the frequency of the scheduling being created. Then, click the on the "Next" button and provide more details about the selected frequency. Fill in all the necessary fields and click again on "Next".
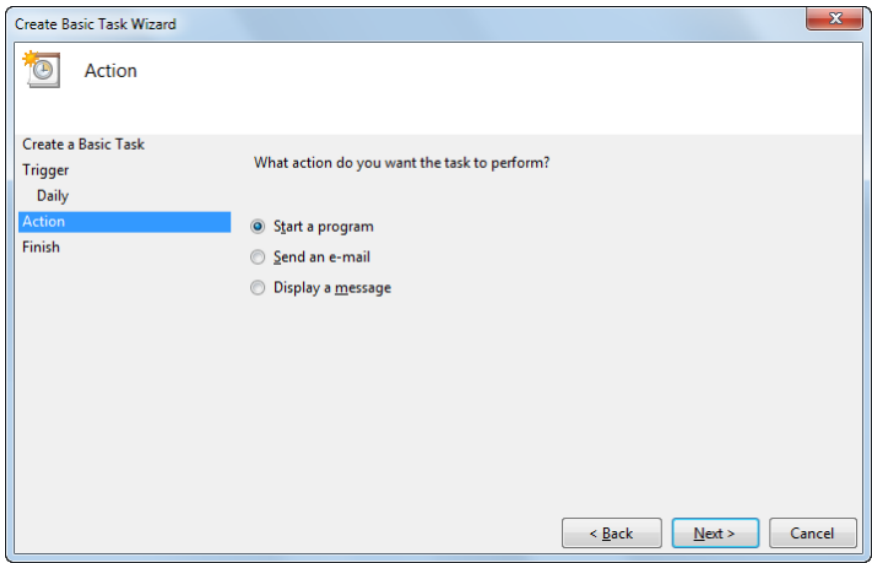
iv. In the Action step, select the Start a program option and click on "Next":
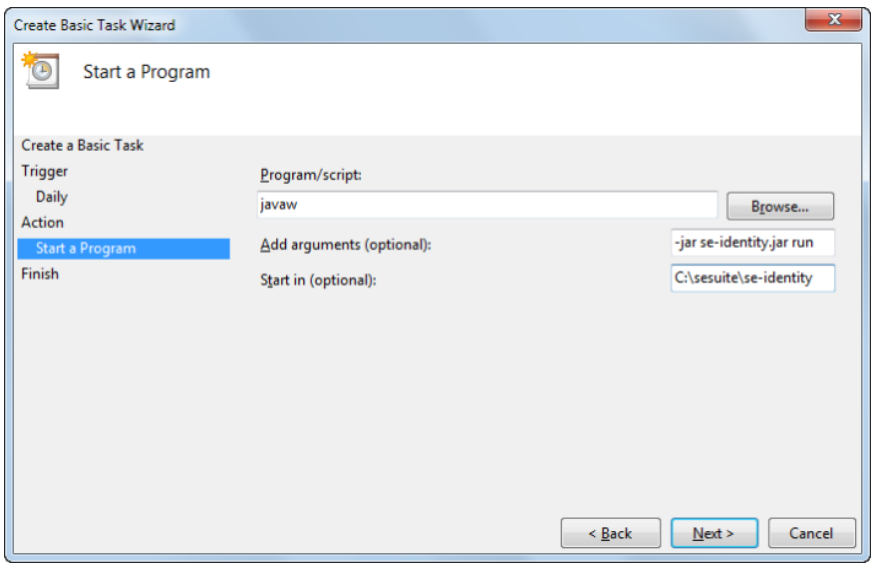
v. Now, fill in the fields related to the SoftExpert Identity startup:
Program/script:
$ javaw
Command for running se-identity.jar. Make sure the Java installation folder is configured in the system PATH (environment variables) so that the file can be executed from any directory, or enter the specific path for the desired version.
Add arguments (optional):
$ javaw -jar se-identity.jar run
Command used as javaw argument for executing the se-identity.jar file.
Start at (optional): Enter the path where the application is located. For example:
C:\sesuite\se-identity
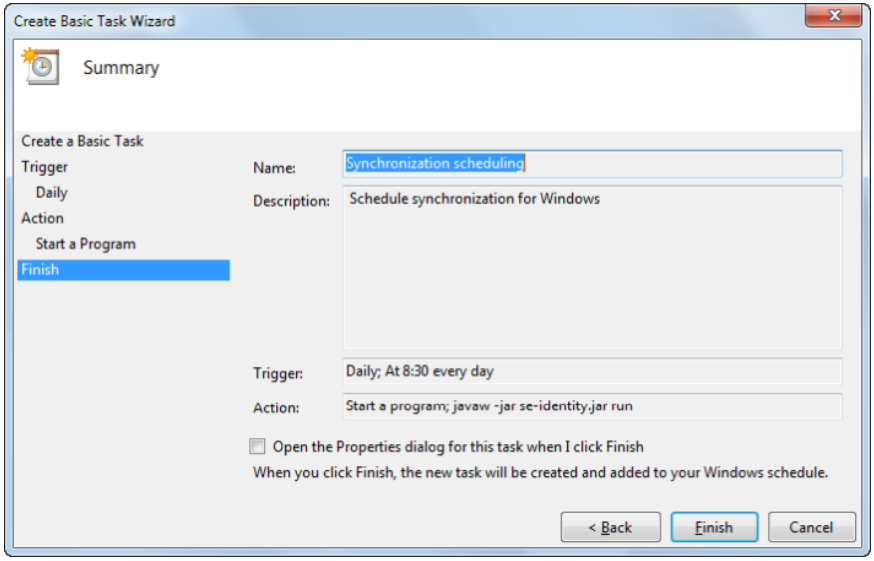
vi. Once done, click on Next. In the Finish step, review the scheduling summary and click on Finish to complete the configuration. From this moment on, the SoftExpert Identity application will run automatically according to the frequency defined in the schedule.