Configuring user provisioning
The user provisioning configuration is divided into two steps: first, you need to set up SoftExpert Suite, generate the security token, and schedule the import of provisioned users; second, you need to configure provisioning on the Azure Active Directory platform.
Next, we will show how to set each configuration:
Configuration in SoftExpert Suite:
- To add a new configuration in SoftExpert Suite, access "Configuration component > Configuration > SCIM provisioning (CM033)". From the left side tab, select "Configuration" and click on the "Add secret token" button.
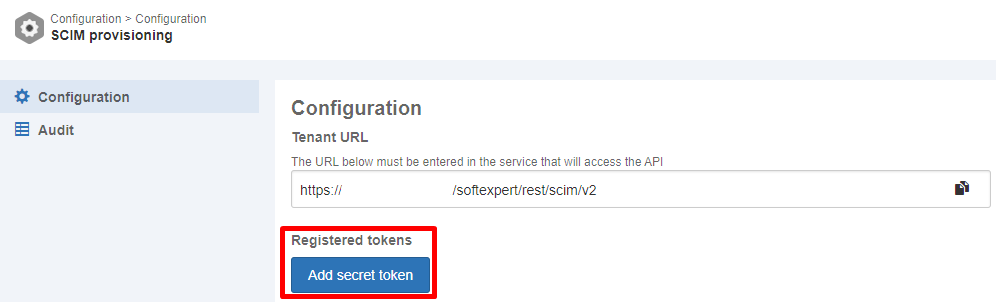
- Enter a name for this configuration in the ID # field and save the information,
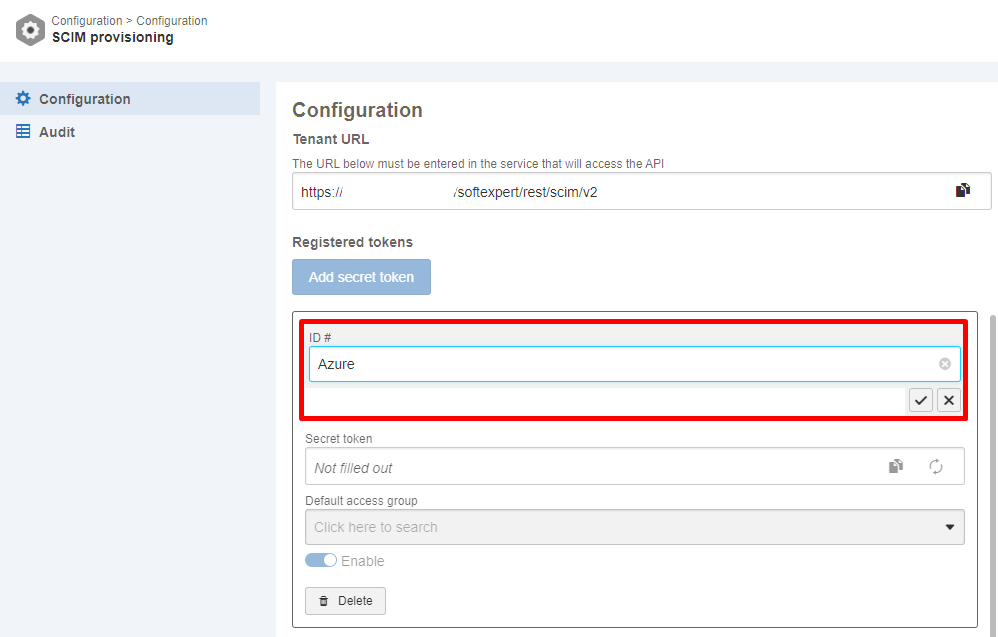
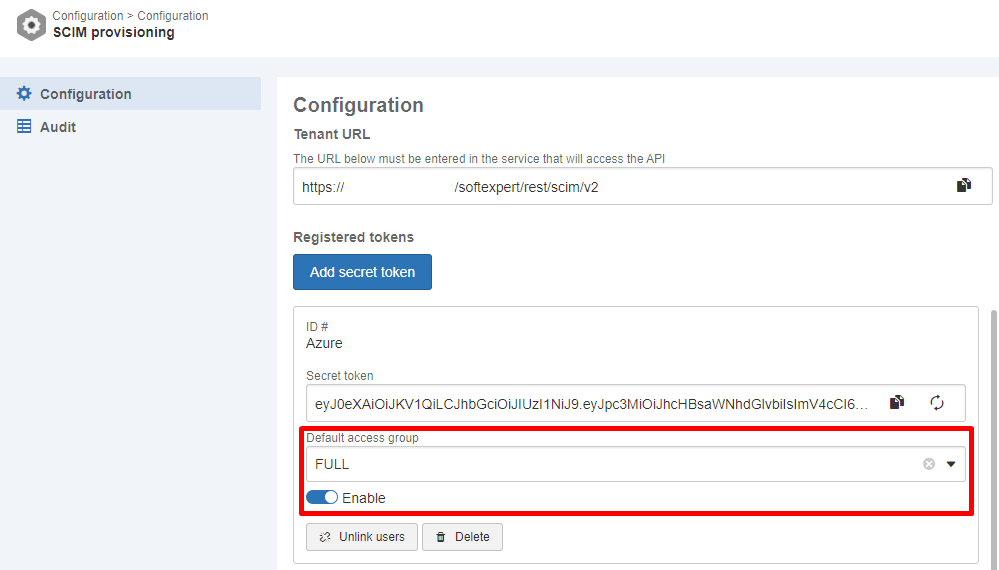
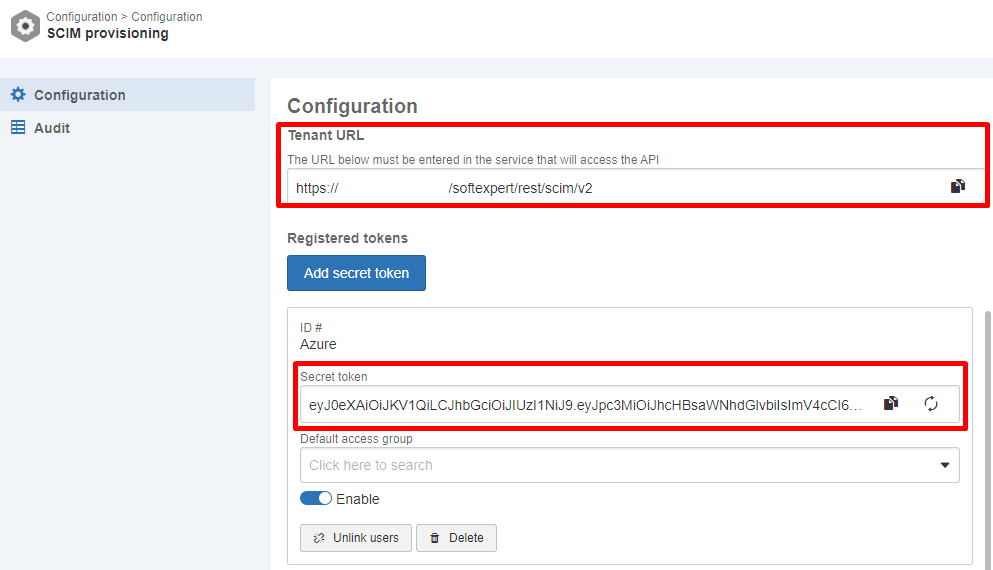
- After saving, the configuration will be recorded in the system as "Enabled", and a security token will be generated. The values entered in the "Secret token" and "Tenant URL" fields will be required for configuring provisioning in Azure.

It is also possible to enter a default access group for new users provisioned via SCIM in the "Default access group" field.
⚠️ Attention:
- The default access group will only apply to new users provisioned through SCIM. This means that, if a user was previously provisioned without the default access group information, and the settings are later updated for the inclusion of the default access group, that user will not have the access group assigned in future updates to their record.
Configuration in Azure Active Directory:
- Access Azure Active Directory and find your enterprise application on the list of enterprise applications. Select the desired enterprise application and, from the side menu, choose the "Provisioning" option. Then, click on "Get started" to start configuring provisioning.

- In the "Provisioning Mode" field, select the "Automatic" option. Next, go to the "Admin Credentials" section. In the "Tenant URL" and "Secret token" fields, enter the corresponding values found in the "Tenant URL" and "Secret token" fields configured in "Configuration component > Configuration > SCIM provisioning (CM033)" within SoftExpert Suite.
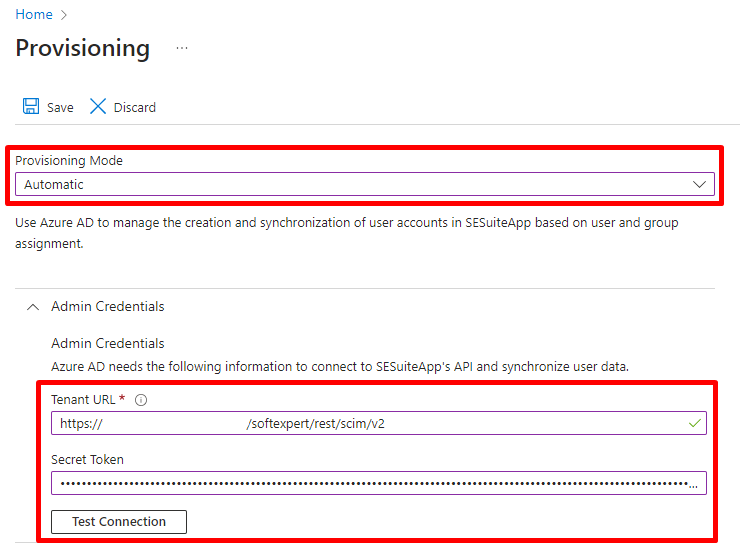
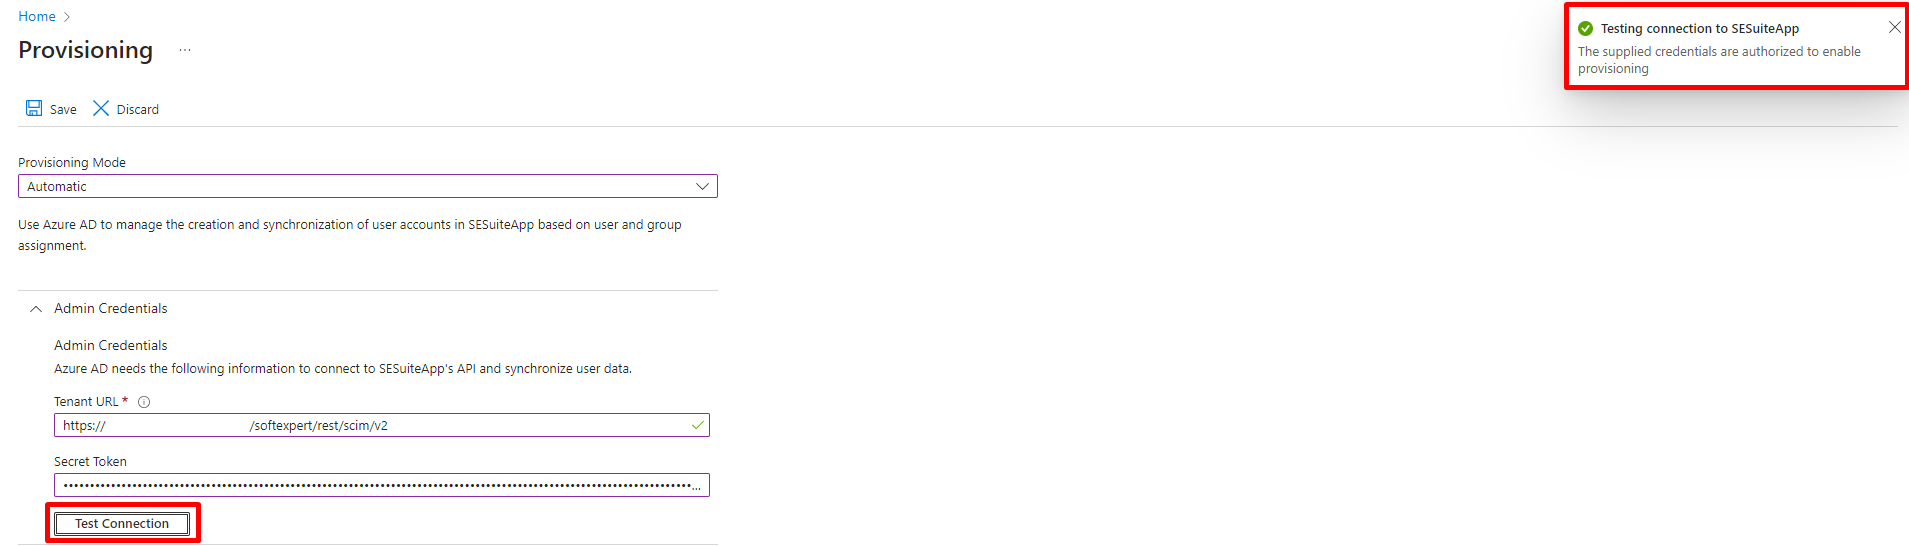
- After filling in the fields, click on the "Test Connection" button to test the connection. Then, click on "Save" to save the settings and enable attribute mapping.
- In provisioning configuration, go to the attribute mapping section in "Mappings". Next, click on the "Provision Azure Active Directory Groups" link to access information related to group provisioning in Azure Active Directory.
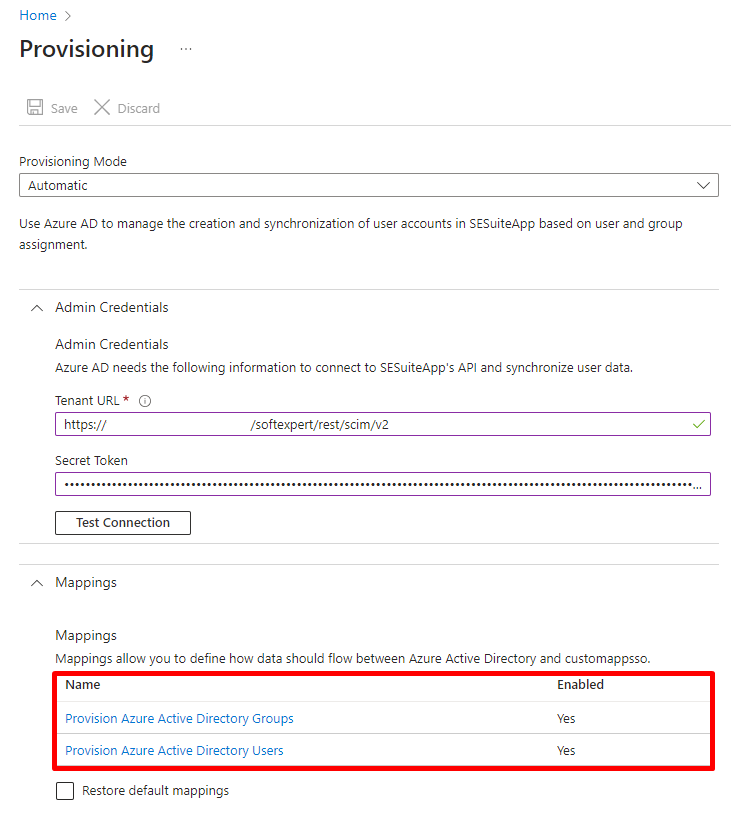
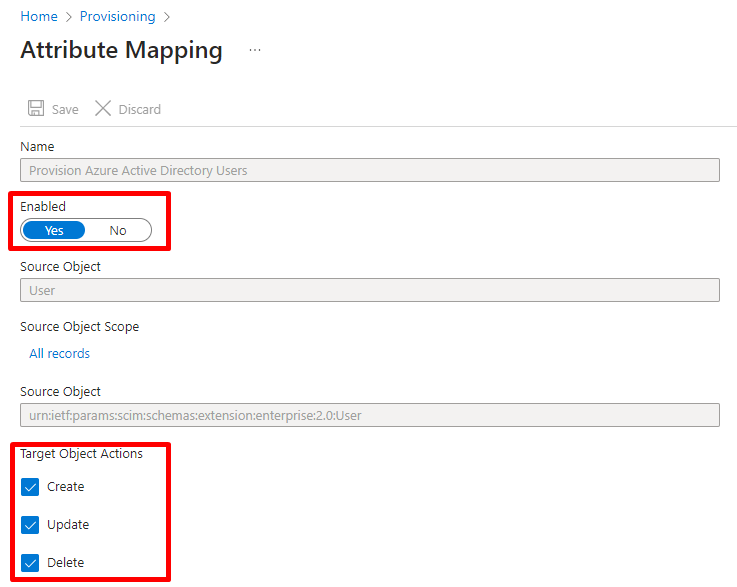
- On the provisioning configuration screen, in the "Mappings" section, click on the "Provision Azure Active Directory Users" link to configure the attribute mappings of the provisioned users. Make sure to keep the "Enabled" option with the value**"Yes"** and, in "Target Object Actions", select these options:Create, Update, Delete. These settings will ensure that users are correctly created, updated, and deleted during the provisioning process.
- Still in the user attribute mapping configuration step, you must delete the attributes highlighted in the following image:
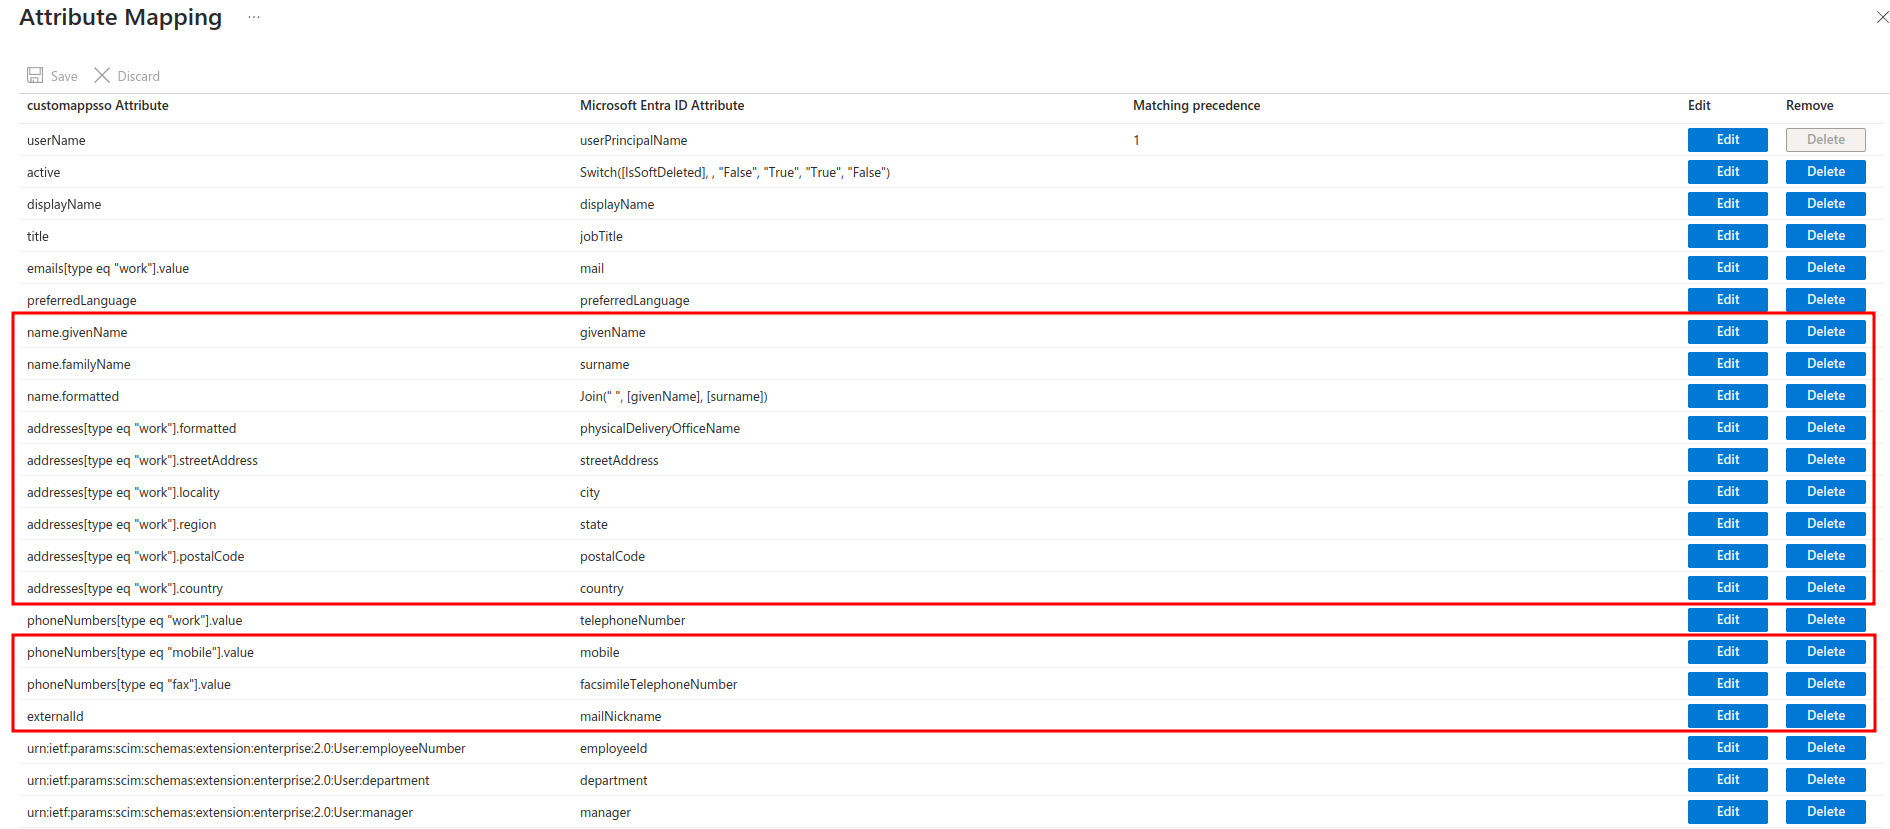
When you remove these attributes, they will not be included in the process of provisioning users to Azure Active Directory. Make sure to save your settings after the deletions.
⚠️ Attention:
- The attributes highlighted in the previous image must be necessarily deleted, as SoftExpert Suite does not use them and, if they are maintained, the users will not be provisioned.
The following table maps the fields and attributes of user records in Azure Active Directory with the fields of user records in the "Administration > File > Organizational unit > User (AD004)" menu.
The table updated with the additional fields is:
| Azure field | Azure Active Directory Attribute | customappsso Attribute | User field (AD004) | Required |
|---|---|---|---|---|
| User Principal Name | userPrincipalName | userName | Login | True |
| Switch( [IsSoftDeleted], , "False", "True", "True", "False") | active | Record Status | True | |
| Name | displayName | displayName | Name | True |
| Job Title | jobTitle | title | Position | False |
| emails [type eq "work"].value | False | |||
| Preferred Language | preferredLanguage | preferredLanguage | Language¹ | False |
| Phone | telephoneNumber | phoneNumbers[type eq "work"].value | Office phone | False |
| Employee ID | employeeId | urn:ietf:params:scim:schemas:extension:enterprise:2.0:User:employeeNumber | User ID | True |
| Department | department | urn:ietf:params:scim:schemas:extension:enterprise:2.0:User:department | Department | False |
| Manager | manager | urn:ietf:params:scim:schemas:extension:enterprise:2.0:User:manager | Leader² | False |
| Company name | companyName | urn:ietf:params:scim:schemas:extension:enterprise:2.0:User:organization | Organizational Unit³ | False |
The Language¹ attribute supports the following languages:
⚠️ Attention:
- The "Code" column in the table below corresponds exactly to the value that must be sent in the attribute.
- If no value is sent in the attribute, the system default language will be used.
| Language | Code |
|---|---|
| English (American English) | en-us |
| Portuguese (Português do Brasil) | pt-br |
| Spanish | es-es |
| Portuguese (Português de Portugal) | pt-pt |
| German | de-de |
| French | fr-fr |
| Romanian | ro-ro |
| Chinese | zh-cn |
| Italian | it-it |
| Slovak | sk-sk |
| English (British English) | en-gb |
| Turkish | tr-tr |
| French (Français canadien) | fr-ca |
| Russian | ru-ru |
| Polish | pl-pl |
| Catalan | ca-es |
| Danish | da-dk |
| Finnish | fi-fi |
| Japanese | ja-jp |
| Czech | cs-cz |
⚠️ Attention:
- Leader²: The current user will be added as a leader to the leader user's record.
- Organizational Unit³: Field used as a parameter to add the user below their organizational unit.
These are the additional attribute mappings between Azure Active Directory and SoftExpert Administration. Check that the attributes are configured correctly in the respective provisioning configurations.
As shown in the example below, there are several departments with the same name (Information Technology), each with its own ID # and allocated below its organizational unit. Using this new attribute, the system is able to map the departments correctly and insert the user into the appropriate organizational unit.
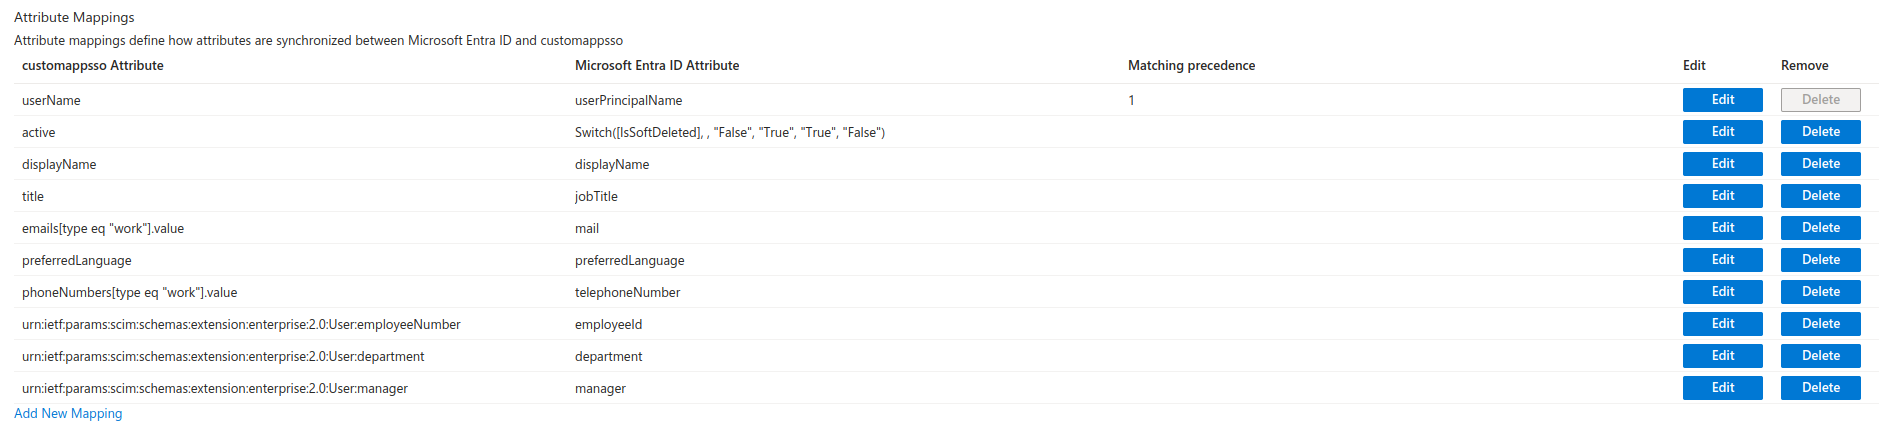
The user attribute mapping configuration should look like the following image:
⚠️ Attention:
- The "customappsso Attribute" column in the user attribute mapping in Azure must not be changed. If it is necessary to modify the value of any attribute, it can be changed in the "Azure Active Directory Attribute" customizable column.