Configuring authentication in AD FS with SAML 2.0
This section will detail how to set up all parties involved in authentication using AD FS and the SAML 2.0 protocol. We will consider as a basis an identity service installed on a Windows Server 2012 R2 server, which natively supports AD FS and the SAML 2.0 authentication protocol.
The configuration involves the following steps:
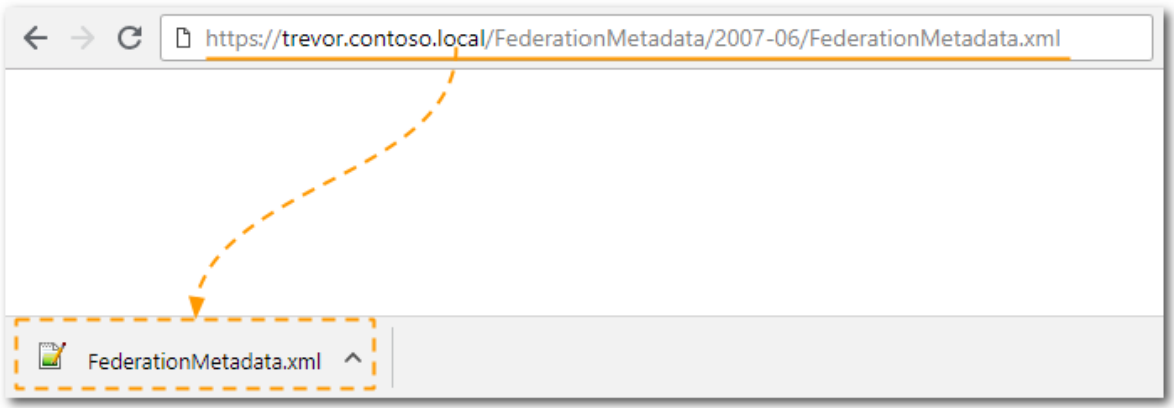
- Get the identity provider metadata: The metadata is located in a file called "FederationMetadata.xml". This file contains the information necessary for SoftExpert Suite to interpret the messages exchanged during the authentication process, such as digital certificates and access addresses. The identity provider will make a URL available for the metadata file to be downloaded. For example: URL for downloading the identity provider metadata file:
https://[SERVERADFS]/FederationMetadata/2007-06/FederationMetadata.xml
Example considering the AD FS server address as "trevor.contoso.local":
https://trevor.contoso.local/FederationMetadata/2007-06/FederationMetadata.xml
- Import the FederationMetadata.xml file into SoftExpert Suite: Access the Configuration component > Configuration > Authentication (CM008) > Authentication services > SAML 2.0. If this section is disabled, select the SAML 2.0 authentication mode in Authentication options. Import the FederationMetadata.xml file so that SoftExpert Suite has access to the necessary identity provider information.
⚠️ Attention:
- The FederationMetadata.xml file contains digital certificates with expiration dates. After the certificates expire, it may be necessary to set a new configuration. See the Reconfiguring authentication in AD FS with SAML 2.0 section for more details about this process.
- After configuring SoftExpert Suite, it is necessary to generate the certificate and export the SESUITE_metadata.xml file. This file contains essential information so that the identity server (AD FS) can interpret the messages sent by SoftExpert Suite during the authentication process, such as the generated certificate and the system access URLs.
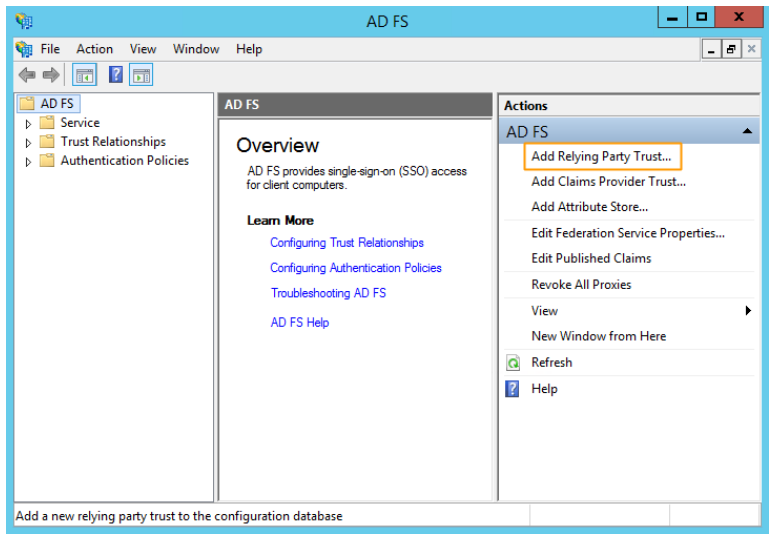
- To import the SESUITE_metadata.xml file in AD FS, follow the steps below using AD FS Management:
- In the "Actions" panel, located on the right side of the screen, click on the "Add relying party trust…" option
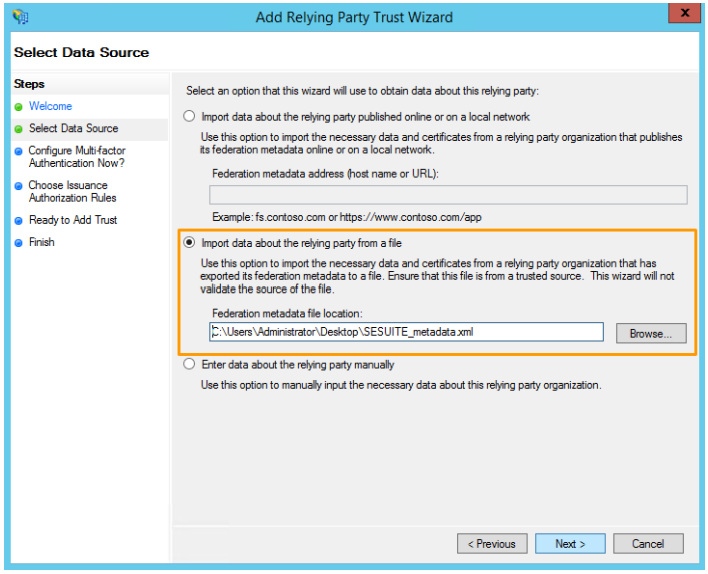
- The configuration wizard will open. Click on "Start" to proceed with the operation.
- In the Select data source step, select the "Import data about the relying party from a file" option and, in the field below, select the SESUITE_metadata.xml file. Once done, click on Next:
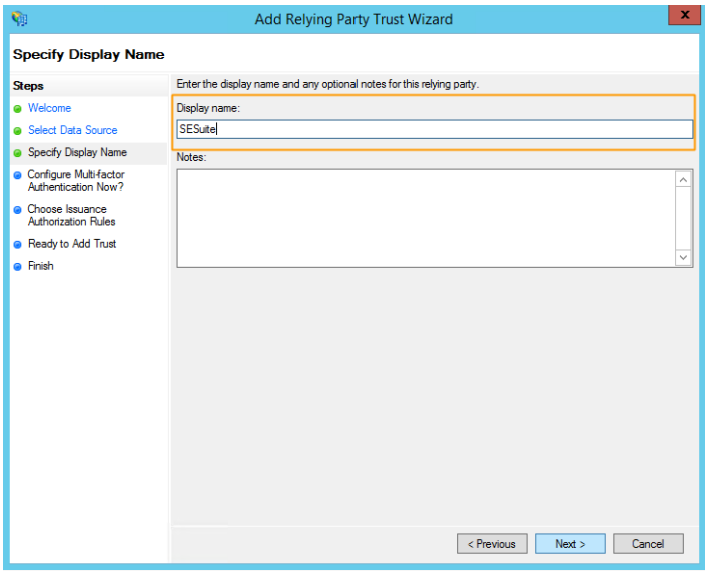
- In the "Specify display name" step, enter a name to identify the configuration. Once done, click on Next:
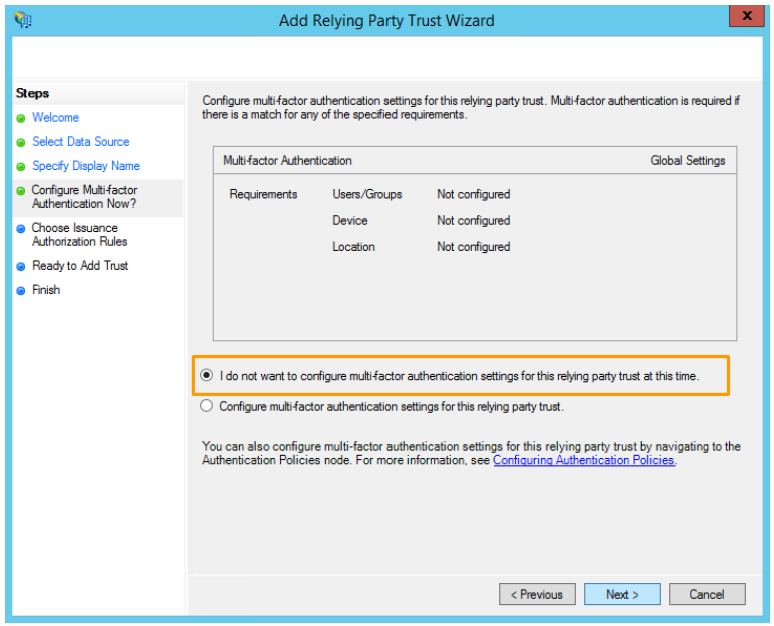
- In the Set up multi-factor authentication now? step, select "I do not want to configure multi-factor authentication settings for this relying party trust at this time.". Once done, click on Next:
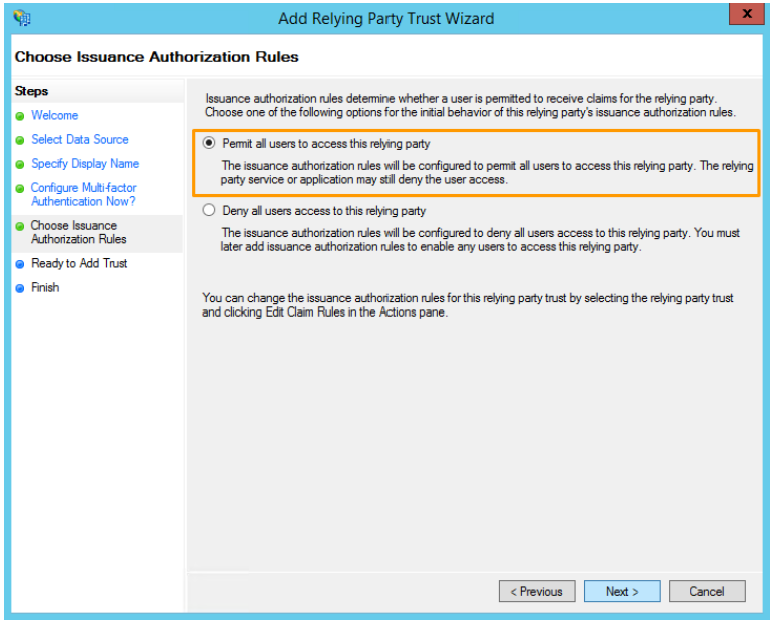
- In the Choose issuance authorization rules step, select "Allow all users to access this relying party". Once done, click on Next:
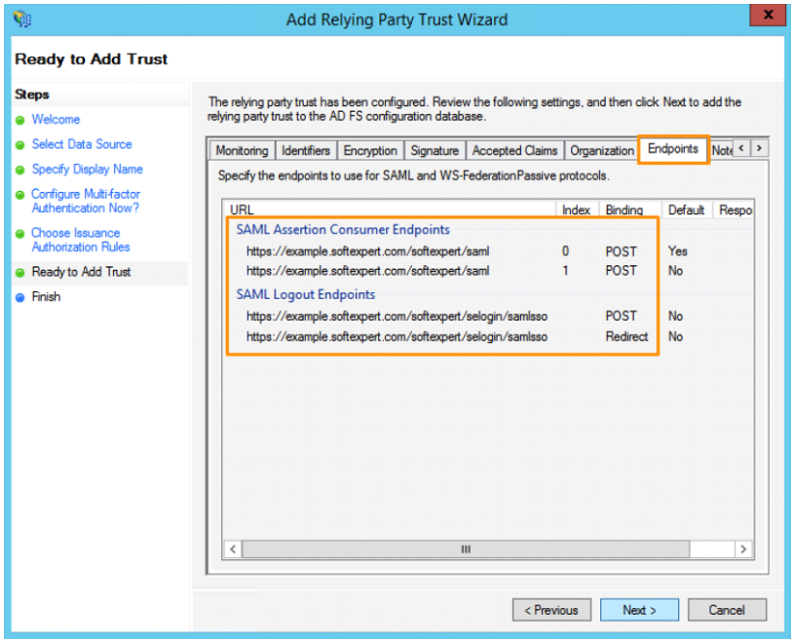
- Verify the information shown in the "Endpoints" tab of the Ready to add trust step, checking that the URL shown corresponds to the correct SoftExpert Suite access URL. Once done, click on Next:
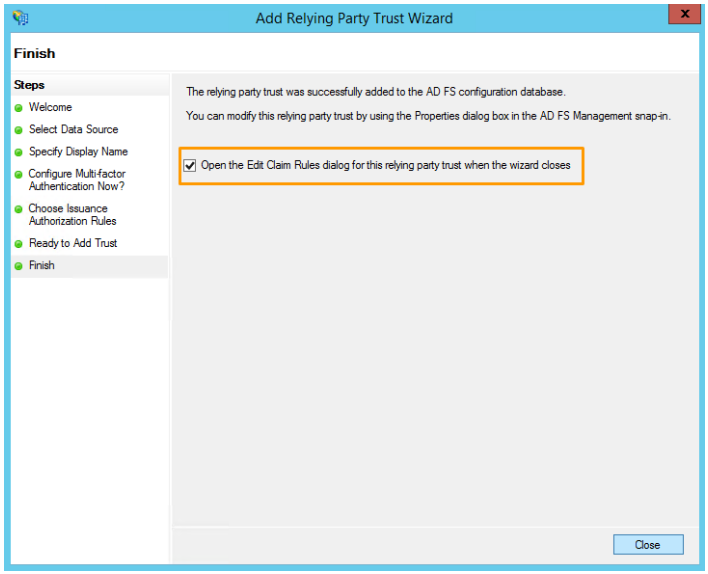
- In the Finish tab, select "Open the Edit Claim Rules dialog for this third relying party trust when the wizard closes", and then click on Close:
- Next, configure the "Claim rules". If the option to edit claim rules was not previously checked, you can access the claim rules by going to the "Relying party trusts > Edit claim rules" AD FS Management menu:
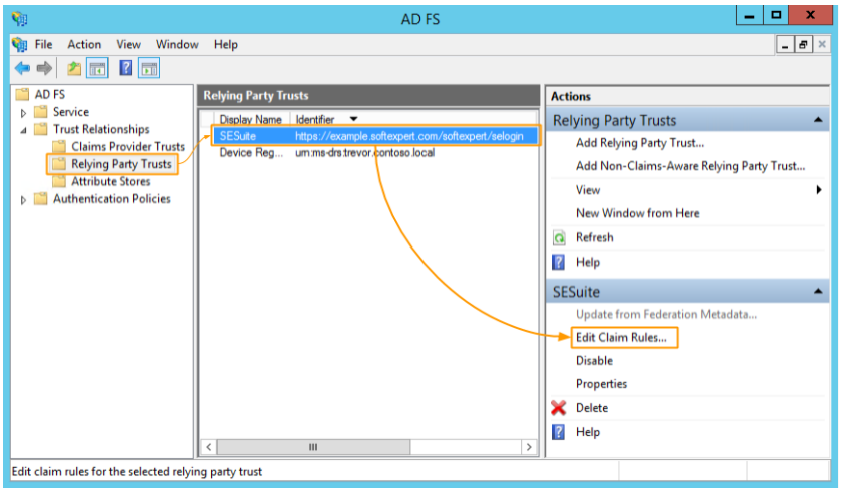
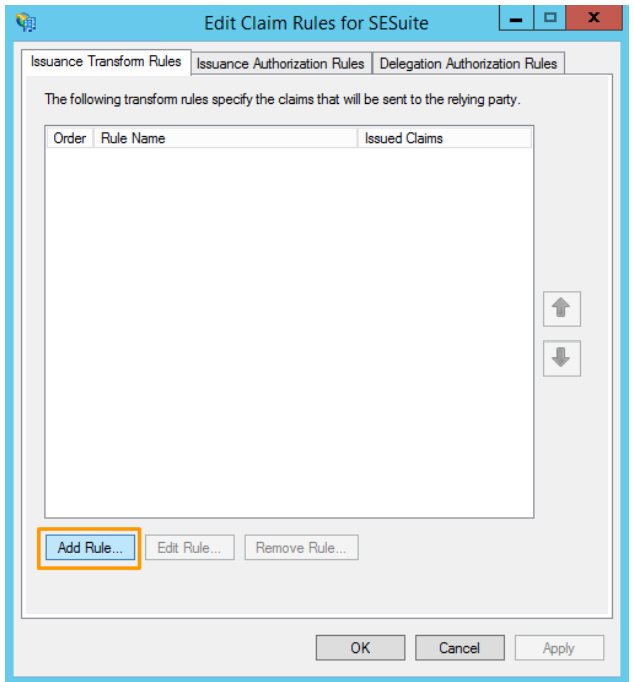
- To add a new rule, in the "Issuance transformation rules" tab of the screen that will open, click on the "Add rule" option:
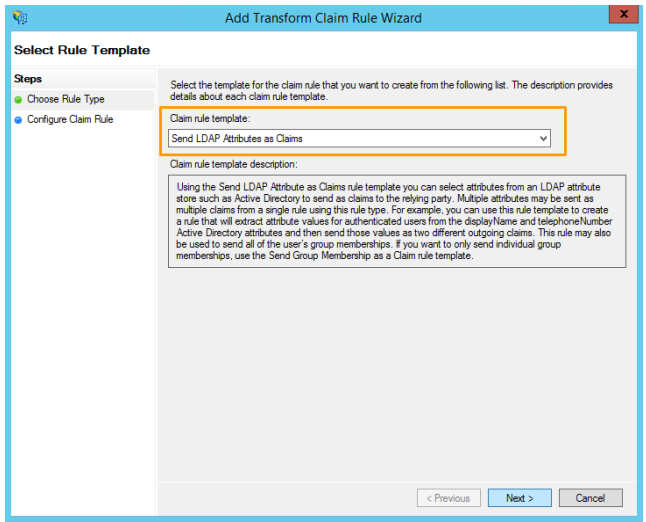
- In the Choose rule type step, select "Send LDAP attributes as claims" and click on Next:
- In the Configure claim rule step, configure the fields, as shown in the following image. Once done, click on Finish:
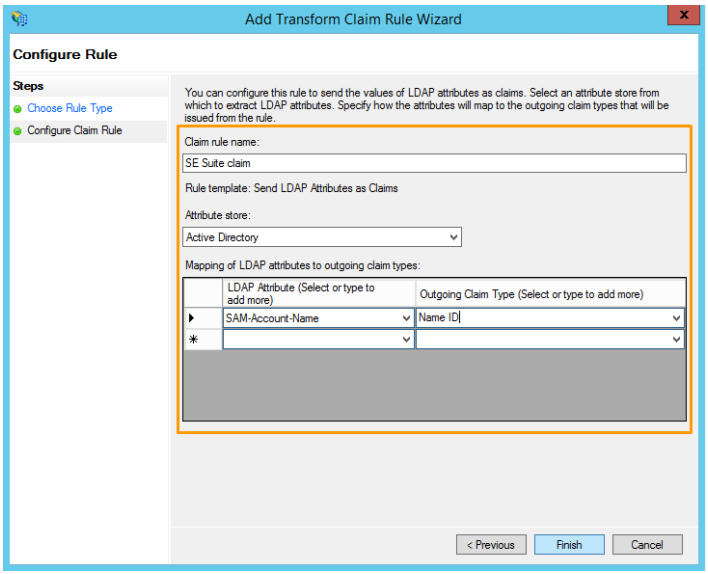
In some identity providers, it may be necessary to specify the credential ID # in the SAML configuration. To do this, access the "Configuration > Configuration > Authentication (CM008) > Authentication services > SAML 2.0" menu, edit the configuration record, and in the "Credential ID" field, enter the value "Name ID".
- Once this is done, the created rule will be shown on the list in the "Issuance transformation rules" tab. Click on OK to finish editing the claim rules.
- The last step of configuring single sign-on via SAML 2.0, before testing authentication, is configuring the browsers:
Google Chrome
To add Google Chrome to the list of browsers with authentication protection on the ADFS authentication server, follow these steps:
- Open PowerShell as admin.
- Run the following command to momentarily disable authentication protection:
Set-ADFSProperties – ExtendedProtectionTokenCheck None
- Then, run the following command to list the browsers that support authentication protection:
Get-ADFSProperties | Select -ExpandProperty WIASupportedUserAgents
- Supported browsers will be displayed. Select all listed browsers and add the "Mozilla/5.0" browser to the list. For example:
Set-ADFSProperties -WIASupportedUserAgents @("MSIE 6.0", "MSIE 7.0", "MSIE 8.0", "MSIE 9.0", "MSIE 10.0", "Trident/7.0", "MSIPC", "Windows Rights Management Client", "Mozilla/5.0")
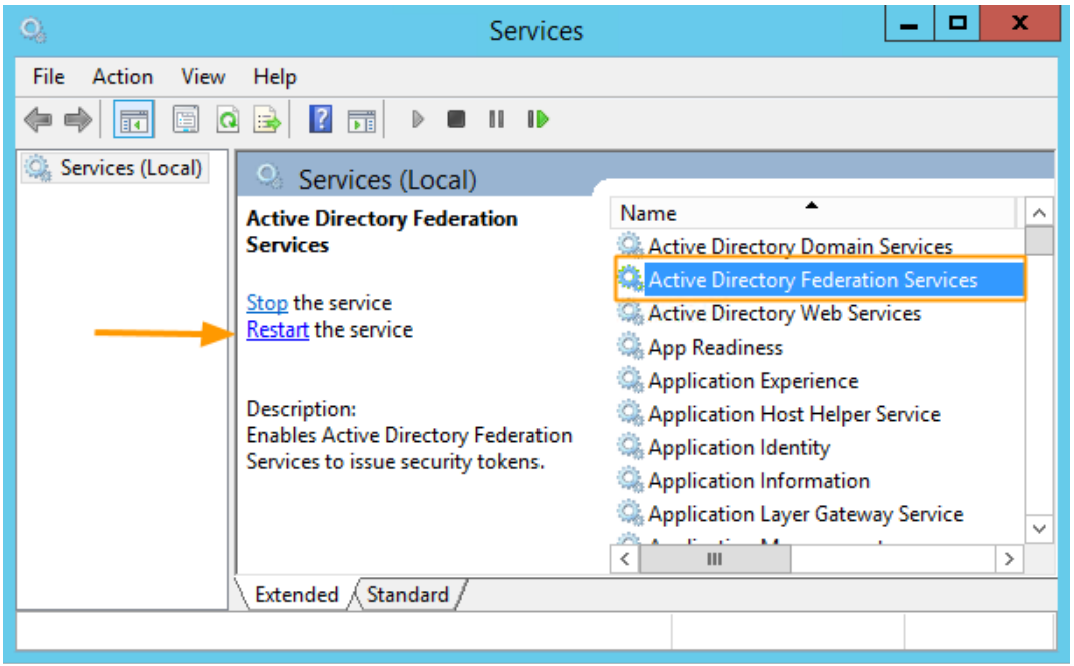
- After running these commands, Google Chrome will be included in the list of browsers with authentication protection on the ADFS authentication server. Make sure to restart the ADFS service for the changes to take effect.
To check whether the browser was correctly added to the list of browsers with authentication protection on the ADFS server, follow these steps:
- Restart the ADFS service for the changes to take effect.
- After restarting the service, open PowerShell as admin.
- Run the following command to list the browsers that support authentication protection:
Get-ADFSProperties | Select -ExpandProperty WIASupportedUserAgents
- Check whether the "Mozilla/5.0" browser is on the displayed list. If it is, it means that the browser was correctly included in the list.

Make sure that all previous steps have been performed correctly, and that you have restarted the ADFS service for the changes to take effect. If the "Mozilla/5.0" browser is on the list, this indicates that it was included correctly and is configured with authentication protection on the ADFS server.